![tuaregs[AI]](/_next/image/?url=%2Fimg%2Flogo-tuaregs.png&w=640&q=75)
1. Introduction
Git is a version control system.
Think of version control as a timeline containing the history of your code.
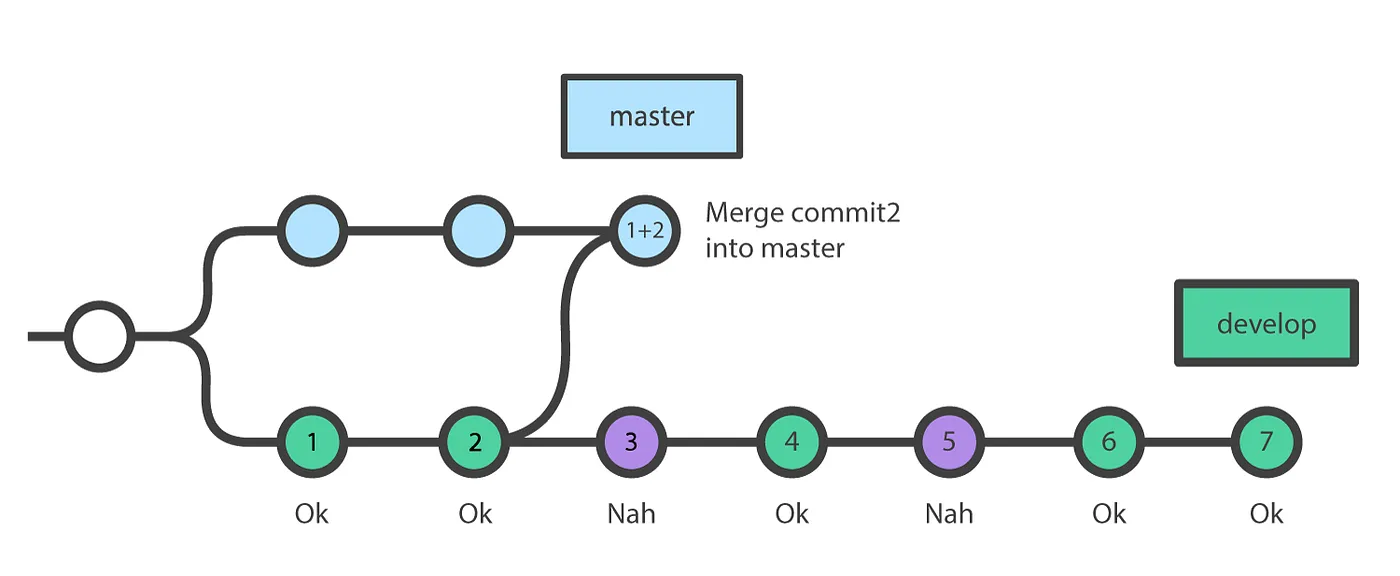
Image from: https://faun.pub/awesome-git-technique-for-partial-merge-7d64a7e62440
You have your project on your local computer. Git calls that 'working directory' (or workspace).
Then you have the server (like GitHub or BitBucket), where your code will be stored. That's your 'remote'.
The idea is to be able to have a copy of your local work in the server, creating a recoverable versions of your project through time.
Your local codebase will be synchronized with the server, meaning you gonna modify your code locally and publish these modifications periodically to your remote.
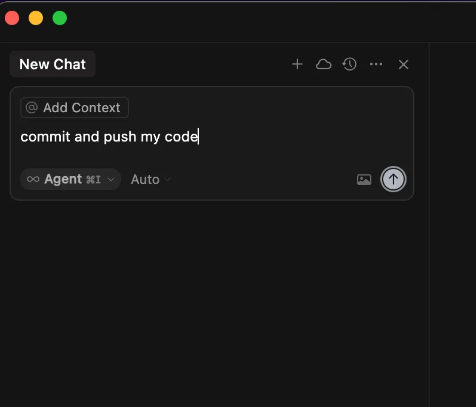
All git commands are executed on the local terminal (or on any GUI like VSCode, Cursor, SourceTree, Kraken).
You can 'vibe code' them also ;)
💡 Note
This is basic Git guide.
Meaning lots of information were intentionally omitted to keep it simple.
For more concepts check this tutorial, or you can always ask your favorite LLM ;)
2. Basic Concepts
You have your project in your computer.
You want to send it into version control server, let's say GitHub.
Sign up, create an account there and then create a repository. There's where your code will be stored.
Back to your local project, to make everything work you need to run a couple of git commands.
$ cd /path/to/my/project
$ git init
$ git add .
$ git commit -m "Initial commit"
$ git remote add origin https://github.com/myuser/myrepository.git
$ git push -u origin main
Initialize git repository on my project folder, create a .gitignore with the most common entries, create a README.md with an overview of the project, add and commit all the files, set the remote url to
https://github.com/myuser/myrepository.git
and push everything.
Probably on the first time you may have to deal with GitHub authentication. If you do it via Cursor, the process is guided. Just follow instructions or in case of issues try some troubleshooting here.
3. Essential Commands
Clone
Download a copy of the repository code into your computer.
$ git clone https://github.com/torvalds/linux.git$ gh repo clone torvalds/linuxCommit
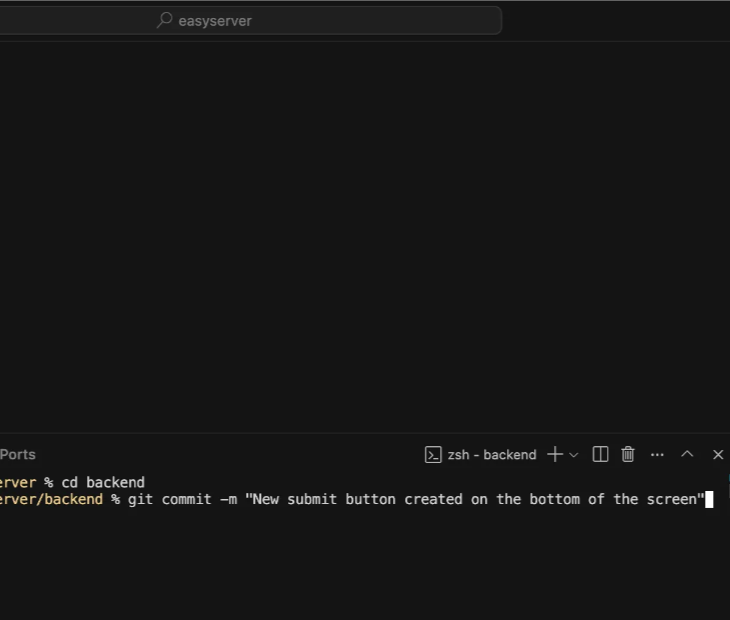
You take 'pictures' of your project state, along with a message describing what was modified in the code. Those are the commits.
They stay locally on your computer, until you use the push command to publish them. You can store as many commits as you want before sending to server.
$ git commit -m "Replaced filters for an empty state in the header section"Commit my changes. Generate a meaningful message.
Other concept that work together with commit is 'staging' changes which means select specific parts of changes to be included in the next commit.
Push
Sends the commits to server. This way you actually publishes the 'snapshots' you've been making with the commits.
Only after pushing modifications you gonna see them in the server.
$ git push origin mainPush all the changes to the server.
4. Working with Branches
Checkout Branch
Branches are a way to keep two different timelines.
You can name them 'feature-x', or 'alice', depending of what you need it for.
With this command you can either create or change your current branch (-b argument).
After creating it you need to push it to the server.
$ git checkout -b developCreate a new branch called develop.
# or if existing branch
Switch to the branch develop.
Merge
Let's say you have two branches: main and develop.
And you decide you gonna keep main branch with only stable code, same as production.
At some point, develop branch has way more code than main one.
So you need to merge the differences between develop and main.
The idea of a merge is to make both branches the same. The differences from one will be added to the other.
5. Best Practices
.gitignore
This file contains the files you don't want to send to the server. They'll be forever local.
# dependencies
/node_modules

# testing
/coverage

# production
/build
/dist

# misc
.DS_Store
.env.local

# logs
npm-debug.log*
yarn-debug.log*

# IDEs and editors
.vscode/
.idea/
*.sublime-workspace
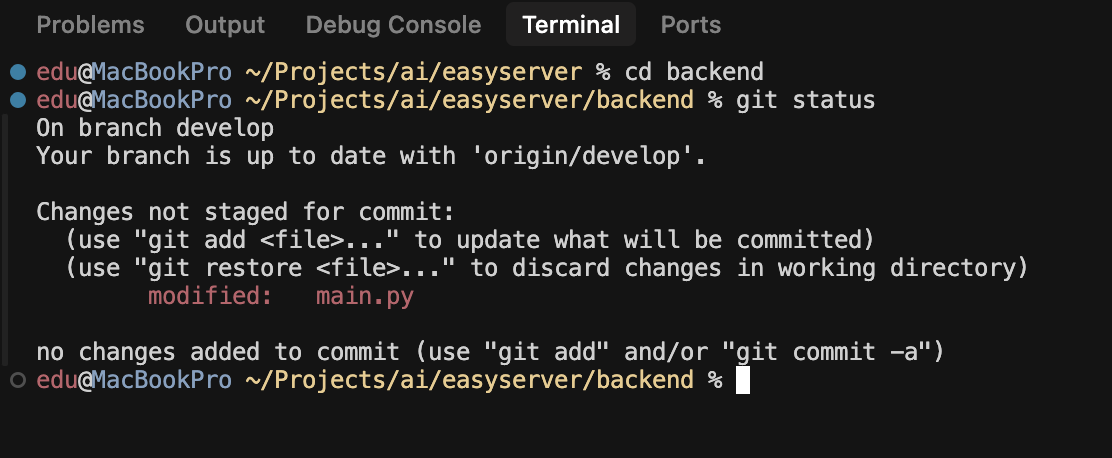
Status
Git status gives you basically a short report of the state of your local workspace.
Can be a git command, but in general the IDE will provide a visualization of the status.

See also
- Git Flow
- Feature branch
- Stash
- Amend